Why Seed Indoors?
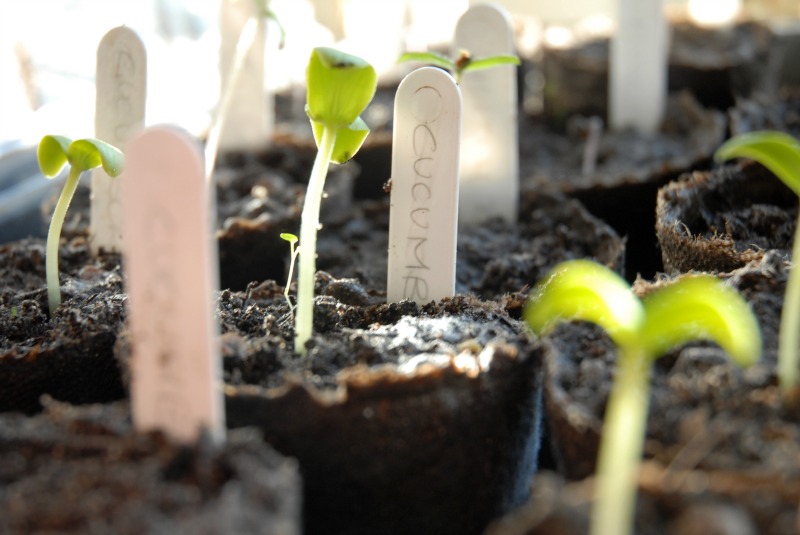
Raising seedlings inside during the cold winter months before spring is for anyone who enjoys gardening projects. It’s a great way to satisfy your craving to see green things growing again, and to prepare plants that may not have time to mature outside when spring takes its time arriving. Buying seeds and raising them on your own is also generally cheaper than buying pre-grown plants.
What You Need
Seeds of course! Seeds can be bought in stores or garden centers, and by mail order, but you can find a larger variety of plants online. You will also need containers to grow your plants in. We recommend finding cell flats or plant trays, which are divided containers that grow one seed per container. You can also purchase these online or at garden centers.
Growing Requirements
Soil: Most of the generic seed-growing mixes found at garden centers and online are fine to use for indoor seeding. These mixes will not have soil in them; they are made of vermiculite and peat, which promote healthier growth. We have successfully grown seeds in regular potting mix all the way through their time indoors, but this method has a higher probability of the plants not growing properly. Plant the seeds according to directions on their package, but in general, seeds are planted around two inches below the surface of the soil. Sprouts can later be moved to a potting mix.
Light: Natural light from windows is normally adequate to grow seedlings, though they will need to be placed in the brightest part of your house. However, if the seedling isn’t getting enough light, it will reach for it and become long and spindly. You may want to buy fluorescent lighting, as their consistent, ample light can help promote health growth. Use artificial lighting for only 12-16 hours a day, because plants also need darkness in order to develop properly.
Water: A consistently moist environment for seedlings is ideal. You don’t want to drown the seeds—that will lead to rot and disease— just keep the soil mix damp. Dab your finger in a corner of the container, disturbing the plant as little as possible. If the soil squishes a bit to the touch, you’ve watered enough. If it is firm and crumbly, you haven’t.
Bottom heat (optional): Having heat underneath your plant flats can help keep roots healthy, and it speeds up the germination process. Seed heat mats are available to buy online or at garden centers. However, bottom heat is not necessary to successfully grow seedlings.
Fertilizer (optional): Seeds are at the start full of energy and nutrients, so there is no need to fertilize until the plants have at least several leaves. But you may want to skip this step altogether. Fertilize too little and no benefit is gained, but over-fertilize and you risk killing your plants. Some recommend you use ¼ of the strength of fertilizer the packaging says to use on seedlings.
When To Start
The time to plant your seeds indoors depends on each specimen, so it’s best to look at the package for the correct date. Here’s a link to a table with general planting times for common vegetables and flowers.
Planting Your Seedlings Outside
Seedlings grown inside cannot simply be placed outside. They are not accustomed to the elements and need to go through a process called “hardening off” to prevent them from getting burned by sun or wind. To acclimate your plants, put them outside for short periods of time. Start this process two weeks before you plan to transplant them. Choose a protected location shaded from direct sunlight and sheltered from wind. Start with a few hours, then gradually increase the time. Bring your seedlings inside if the temperature is going to drop. Even after hardening off some plants may still wilt when finally placed in full sun in a garden.
The best way to raise seedlings is practice and don’t be afraid to fail. We at Eagleson Landscape are trying to grow some redbud trees from seed right now and have no guarantees they will grow! Gardening is a learning experience, and the learning itself should be fun. Success and failure both teach you how to improve.

